

What to Expect During a Professional Travertine Restoration Service
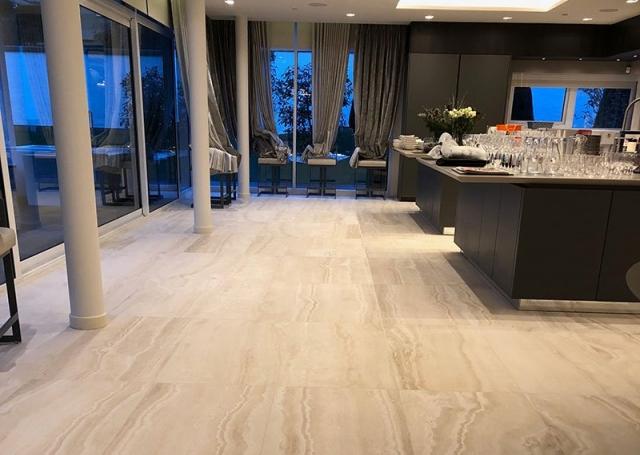
Travertine is one of the most elegant natural stones used in flooring, loved for its warm tones, natural character, and timeless appeal. However, like all natural stone surfaces, travertine is vulnerable to dullness, scratches, stains, etching, and wear caused by daily foot traffic, improper cleaning products, and environmental exposure. A professional travertine floor restoration service is designed not just to clean the stone, but to restore its structure, shine, and long-term durability. Below, you'll find a detailed breakdown of each stage of professional restoration—each section written with roughly 300 words for full in-depth coverage.
1. Detailed Inspection & Condition Assessment
A professional travertine floor restoration process always begins with a thorough inspection. This initial assessment is crucial because no two travertine floors are the same. The technician evaluates the current condition of the stone, identifies problems that must be addressed during restoration, and creates a custom plan tailored to the floor's needs. During the inspection, the professional examines the stone surface for key issues such as scratches, dull patches, deep stains, etching marks, uneven tiles (lippage), and holes caused by natural pits opening up over time.
The inspection also includes checking the grout lines, which often accumulate dirt and discoloration. In many older homes, grout may be cracked or missing in some areas, requiring repair. The technician will determine whether your travertine is honed, polished, filled, or unfilled, as each type requires a slightly different restoration approach. They also assess whether previous sealers have worn off or if there has been moisture absorption leading to discoloration.
This stage helps homeowners understand the exact problems affecting their flooring. The technician may point out areas with heavy foot traffic, spill-prone zones like kitchens, and moisture-prone areas like bathrooms. They also explain the recommended procedures such as grinding, honing, polishing, sealing, or filling pits—giving you complete clarity before the work begins. Ultimately, this inspection sets realistic expectations and ensures the floor receives the right combination of travertine tile restoration techniques for long-lasting results.
2. Deep Travertine Floor Cleaning & Soil Extraction
Once the assessment is complete, the restoration process begins with a thorough and professional travertine floor cleaning. Cleaning is not just the first physical step—it is one of the most essential stages because it prepares the stone for the more advanced restoration procedures that follow. Everyday mopping cannot remove embedded dirt, oils, and grime trapped deep within the pores of travertine. That is why professionals use specialized equipment and pH-neutral stone cleaners that safely lift dirt without damaging the stone's natural structure.
During this stage, technicians apply stone-safe cleaning solutions that break down stubborn residues. They use soft-bristle mechanical scrubbers or rotary machines designed specifically for natural stone surfaces. Unlike harsh DIY products or acidic cleaners like vinegar and bleach—which can cause irreversible etching—professional-grade cleaners restore the stone's clarity without harm. The goal is to extract all dirt from the pores, grout lines, and surface texture.
Stains, grease, food spills, soap scum, and household chemicals are gently lifted away. In homes with pets, lingering odors and organic stains can also be addressed during the cleaning stage. For heavily soiled floors, technicians may use steam cleaning or a deeper slurry cleaning technique where a mixture of abrasive powders is brushed across the surface to remove stubborn buildup.
By the end of this phase, the floor is completely free from surface contaminants. This allows the later steps—such as honing and polishing—to be far more effective, ensuring a flawless finish. Proper cleaning also reveals hidden issues like micro-scratches or etching that were previously masked by dirt. This step ensures the travertine surface is clean, fresh, and ready for the deeper travertine tile restoration procedures ahead.
3. Travertine Repairs: Filling Pits, Cracks & Holes
Travertine is a naturally porous stone that forms small voids within its structure. Over time, these pits can open up, creating holes on the surface that collect dirt and make the floor appear worn or uneven. A key part of travertine floor restoration is addressing these imperfections through professional repair techniques. During this stage, technicians inspect the entire floor for visible pits, cracks, spalling, and chipped edges. Even factory-filled travertine can lose some of its filler due to wear, causing holes to reappear. Filling these areas is essential to maintain both the beauty and structural strength of the stone.
To repair pits and holes, professionals use high-quality epoxy resins, color-matched fillers, or stone-specific compounds designed for durability. These materials are blended with pigments that match the exact shade and pattern of your travertine. This ensures the repairs blend seamlessly with the surrounding tiles, becoming virtually invisible once polished. For cracked tiles, technicians may use epoxy injections to bond the stone back together, or recommend replacing a tile if the crack is too severe.
After filling, the repaired areas undergo smoothing to ensure they sit perfectly flush with the rest of the floor. This not only improves aesthetics but prevents dirt from collecting and creating dark spots over time. Proper filling also prolongs the lifespan of the stone by reinforcing weakened areas, preventing the pits from expanding with foot traffic.
This repair stage is vital because untreated holes can worsen, allowing moisture, bacteria, and debris to accumulate. By restoring the travertine surface with precision, the floor regains its strength, beauty, and uniform appearance. This process prepares the surface for the next stages of travertine tile restoration, such as honing and polishing, which will ultimately give the stone its renewed, polished finish.
4. Lippage Removal & Surface Leveling
Lippage refers to the height difference between adjacent tiles. Even a slight unevenness—sometimes as little as a millimeter—can make the floor feel jagged, cause tripping hazards, and collect dirt along tile edges. One of the most impressive aspects of a professional travertine floor restoration service is the ability to completely eliminate lippage using specialized grinding equipment. Whether caused by installation inaccuracies, shifting foundations, or natural settling, lippage must be corrected to achieve a beautifully smooth and uniform floor.
Technicians begin by identifying high and low spots across the flooring. Using heavy-duty grinding machines fitted with industrial diamond abrasives, they carefully grind down the elevated tiles until they are perfectly level with the surrounding surface. This creates a flat, monolithic floor where each tile transitions seamlessly into the next.
Lippage removal not only enhances the appearance but significantly improves maintenance. When tile edges are uneven, mops and cleaning pads often skip over the low areas, leaving dirt and grime trapped along the lines. By leveling the floor, the technician ensures every inch of the surface can be cleaned evenly and effectively. This also allows the upcoming polishing stages to create a stronger and more uniform reflection.
Another major advantage is safety. High edges can cause tripping, especially in homes with elderly individuals or children. After grinding, the floor becomes safer to walk on and feels noticeably smoother underfoot. Once the grinding process is completed, technicians refine the surface with progressively finer diamond grits, preparing it for honing and polishing.
Lippage removal is not always required in every home, but for floors with uneven tiles, it dramatically improves both aesthetics and function. This step sets the foundation for the perfect final finish during travertine tile restoration.
5. Honing to Remove Scratches, Etching & Wear
Honing is the heart of travertine tile restoration, and it plays a major role in reviving the stone's natural beauty. Over time, travertine develops scratches from dragging furniture, pet claws, and grit carried in from outdoors. It also becomes etched when acidic substances—like vinegar, lemon juice, or certain cleaning products—come into contact with the stone. Etching creates dull, cloudy patches that cannot be cleaned away. Honing is the only way to remove these imperfections.
During honing, technicians use diamond-embedded pads or abrasive powders to gently sand the stone's surface. This process removes the top layer of damaged stone, revealing a fresh, smooth layer underneath. Multiple grits are used, starting with coarser abrasives to eliminate deep scratches and finishing with finer grits to refine the surface.
Honing evens out the texture and restores uniformity across the floor. This is especially important if the travertine has different levels of wear in high-traffic and low-traffic areas. Without honing, polishing would not produce an even shine, as the stone would still contain microscopic scratches.
This stage also prepares the surface for the desired finish—whether matte, satin, or glossy. A matte finish uses lower-grit honing and is ideal for rustic or natural looks. A satin finish uses a medium grit level for a soft glow. A high-gloss finish requires extensive honing followed by advanced polishing techniques for maximum reflectivity.
The honing stage transforms dull and lifeless travertine into a smooth, consistent, and visually appealing surface. It eliminates years of wear in a single service and lays the foundation for the stunning results achieved during polishing. This step is essential for achieving a flawless travertine floor restoration.
6. Polishing for Shine, Clarity & Beauty
Once the surface has been properly honed, the next step is travertine polishing—the process responsible for achieving the final sheen, clarity, and luxurious appearance. Polishing enhances the natural colors and patterns within the stone, making it look richer and more vibrant. It also creates the reflective finish many homeowners love.
Polishing is performed using high-grit diamond pads or specialized polishing powders that interact with the calcium carbonate in travertine. As the polishing machine moves across the floor, friction generates a crystallized sheen on the surface. This can range from a soft glow to a mirror-like gloss, depending on your preference.
A polished finish is not just decorative—it also adds practical benefits. Polished travertine is smoother, which helps reduce dirt adhesion. This makes routine travertine floor cleaning easier and more effective. The shine also highlights the stone's natural beauty, giving the floor a sophisticated, high-end look.
Technicians carefully monitor each section of the floor to ensure the shine develops evenly. They also work around corners and edges using hand tools to maintain a consistent finish throughout the room. The goal is to create a uniform reflection across the entire surface.
Polishing also enhances durability. A properly polished floor is less susceptible to minor scratches, and the compact surface structure provides a degree of resistance against daily wear. However, homeowners must avoid acidic cleaners after the service to maintain the shine.
This polishing stage brings out the full transformation of your travertine tile restoration, making your floors look as stunning as they did when first installed—if not better.
7. Sealing the Travertine for Long-Term Protection
Sealing is the final and most important protective step in travertine floor restoration. Travertine is a porous stone, meaning it absorbs liquids, oils, and household chemicals if left unprotected. A high-quality sealer acts as a protective barrier that prevents staining, discoloration, bacteria growth, and moisture absorption.
Technicians apply a penetrating sealer that seeps deep into the stone's pores. Unlike topical sealers that sit on the surface, penetrating sealers offer protection without altering the stone's natural texture or breathability. This allows the stone to maintain its natural character while gaining long-lasting protection.
Sealing helps prevent damage from common household spills such as coffee, wine, oil, juice, and cleaning chemicals. It also reduces the effects of moisture—especially in bathrooms, kitchens, and entryways. A well-sealed travertine floor stays cleaner for longer because dirt and grime cannot easily settle into the stone's pores.
Professionals ensure the sealer is evenly applied and allow proper curing time for maximum effectiveness. After sealing, the floor is buffed to remove excess product and enhance the finish, leaving the stone beautifully protected and visually appealing.
Many homeowners are surprised at how big of a difference sealing makes. Not only does it improve resistance to stains, but it helps preserve the polished finish. A properly sealed floor requires less maintenance and stays looking new for a much longer time.
Depending on foot traffic and usage, sealing may need to be repeated every 1–3 years. Your technician will guide you on the recommended maintenance schedule to help preserve the results of your travertine tile restoration.
Conclusion
A professional travertine floor restoration service is more than just a deep cleaning—it is a complete rejuvenation of your stone's beauty, structure, and long-term durability. Each stage of the process, from inspection to sealing, plays an essential role in bringing your travertine back to life. The detailed assessment ensures that the restoration plan is tailored to the unique condition of your floor. Deep cleaning removes embedded dirt and prepares the surface for advanced treatments. Repairing pits, cracks, and holes restores the stone's integrity, while lippage removal ensures the tiles are perfectly level and safe.
Honing eliminates years of scratches, etching, and wear, revealing a smooth and fresh layer beneath. Polishing enhances the stone's natural beauty, delivering a sophisticated finish whether you choose matte, satin, or high gloss. Finally, sealing locks in all the restoration work, protecting the stone from future stains, moisture, and discoloration. Together, these steps create a floor that not only looks stunning but is also stronger, smoother, and easier to maintain.
The transformation after professional travertine tile restoration is dramatic. Homeowners often feel as though they have installed brand-new flooring, even if their travertine is decades old. By investing in proper restoration rather than replacement, you preserve the natural charm of the stone, save money, and extend the lifespan of your flooring for many years.
If you've noticed dullness, scratches, uneven tiles, or staining, professional restoration is the best solution. It revives your travertine's natural elegance and elevates the entire appearance of your home. With regular maintenance and proper cleaning habits, your restored floors will continue to look pristine and luxurious.
A beautifully restored travertine floor doesn't just improve your home's aesthetics—it enhances its value and creates a lasting impression. Investing in professional restoration is the smartest and most cost-effective way to keep your stone looking timeless, polished, and truly spectacular.